How Rapid Prototyping Is Done Using CNC Machining
Prototype machining is the process of creating a working model of a novel product or part. It can also be used for creating an updated version of a product. What happens is that a company manufactures a replica of the product or part. This is done so that the clients can inspect and perform a wide range of tests on the product because the final one is manufactured in bulk. Therefore, this is usually done during the product development stage, and only one product or part is created. Prototype machining, also known as CNC prototyping, uses CNC machining technology.
The process of prototype machining
Below is a simple guide on how CNC prototype or prototype machining works;
Step 1: Creating a 3D design
The first part is the creation of a 3D design. This is usually done using CAD software. The software uses a language that the computer can understand and translate easily. Experienced CNC machining experts must do this part of the process.
Step 2: Translation of the 3D design
After the design is created, it is fed to a computer. The computer then translates it into a series of instructions known as G-Code. This is to ensure that the machine or tools used in CNC prototyping can understand the instructions.
Step 3: Feeding of the instructions to the tool
After the instructions are translated into G-Code, they are fed into the machine. Since the instructions are set so that the machine can understand them effortlessly, they require very little manual input.
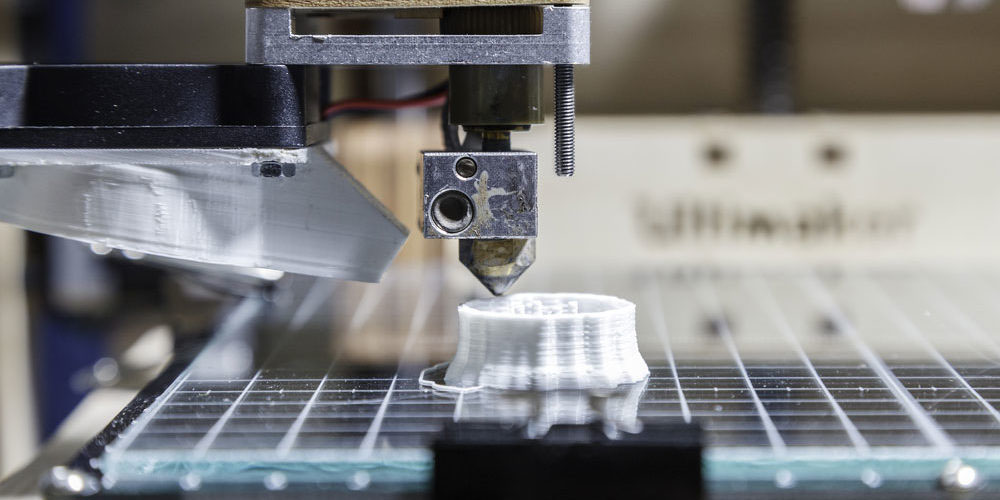
Step 4: CNC prototyping
The next step is to start the prototyping. Once the machine is fed with the instructions, it automatically knows what it needs to do to achieve the design of the prototype. The machine autonomously knows where to cut and the dimensions required.
For this reason, this step of the process is relatively fast and efficient. Note that CNC prototyping is a subtractive manufacturing method. This means that a workpiece is fed into the machine, and parts are removed previously to achieve the design requirements. No new materials are added to the machine.
Step 5: Testing
After the CNC prototype has been created, the development department recruits users who test its various properties. The development team takes notes of all the shortcomings and perfections of the part. Using this information, changes or alterations are made to the design, and another prototype is manufactured. The engineers of the part do this.
After the alterations are made, a new prototype is manufactured using the method explained above. The new part also goes through testing. The process is repeated until all the shortcomings are eliminated.
Conclusion
The best thing about CNC prototyping is that the engineers do not need to start creating the design from scratch. The manufacturing is also very fast hence the reason why CNC is used for rapid prototyping. Another advantage of CNC prototyping is that the same method can be used to create the final part. The manufacturing of the final products is also easy because you can use the initial CAD model with all the new changes.